AWS Console Login:
- jcsdajcsda-usaf: https://jcsda-usaf.signin.aws.amazon.com/console
- jcsda-noaa: https://jcsda-noaa.signin.aws.amazon.com/console
...
- Request a new IAM User account from one of JCSDA’s AWS admins (a member of the JEDI infra team). If you are on JCSDA slack you can ask in jedi-infra-support otherwise you can email evanp@ucar.edu.
- You will be provided with a username, a one-time password, and a login-link.
- Visit the login link and log in. You will be prompted to change your password.
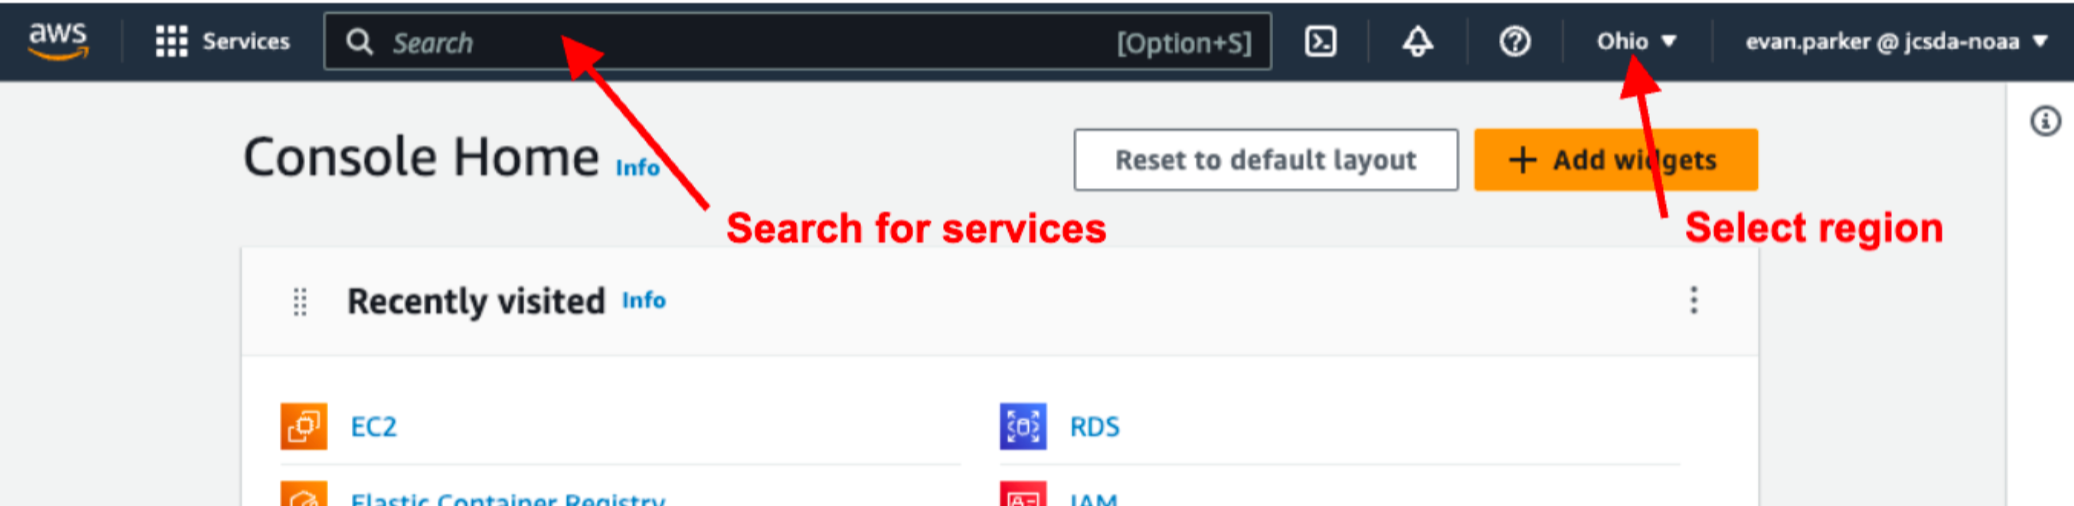
- You are now presented with the console home page.
- Set your default region to “Ohio us-east-2” unless instructed otherwise.
- Set your default region to “Ohio us-east-2” unless instructed otherwise.
- Use the search bar to find the “IAM” console, this can be bookmarked by clicking the star.

- From the IAM page navigate to “My security credentials” which should be available under the “Quick Links” panel. You will see the following options:
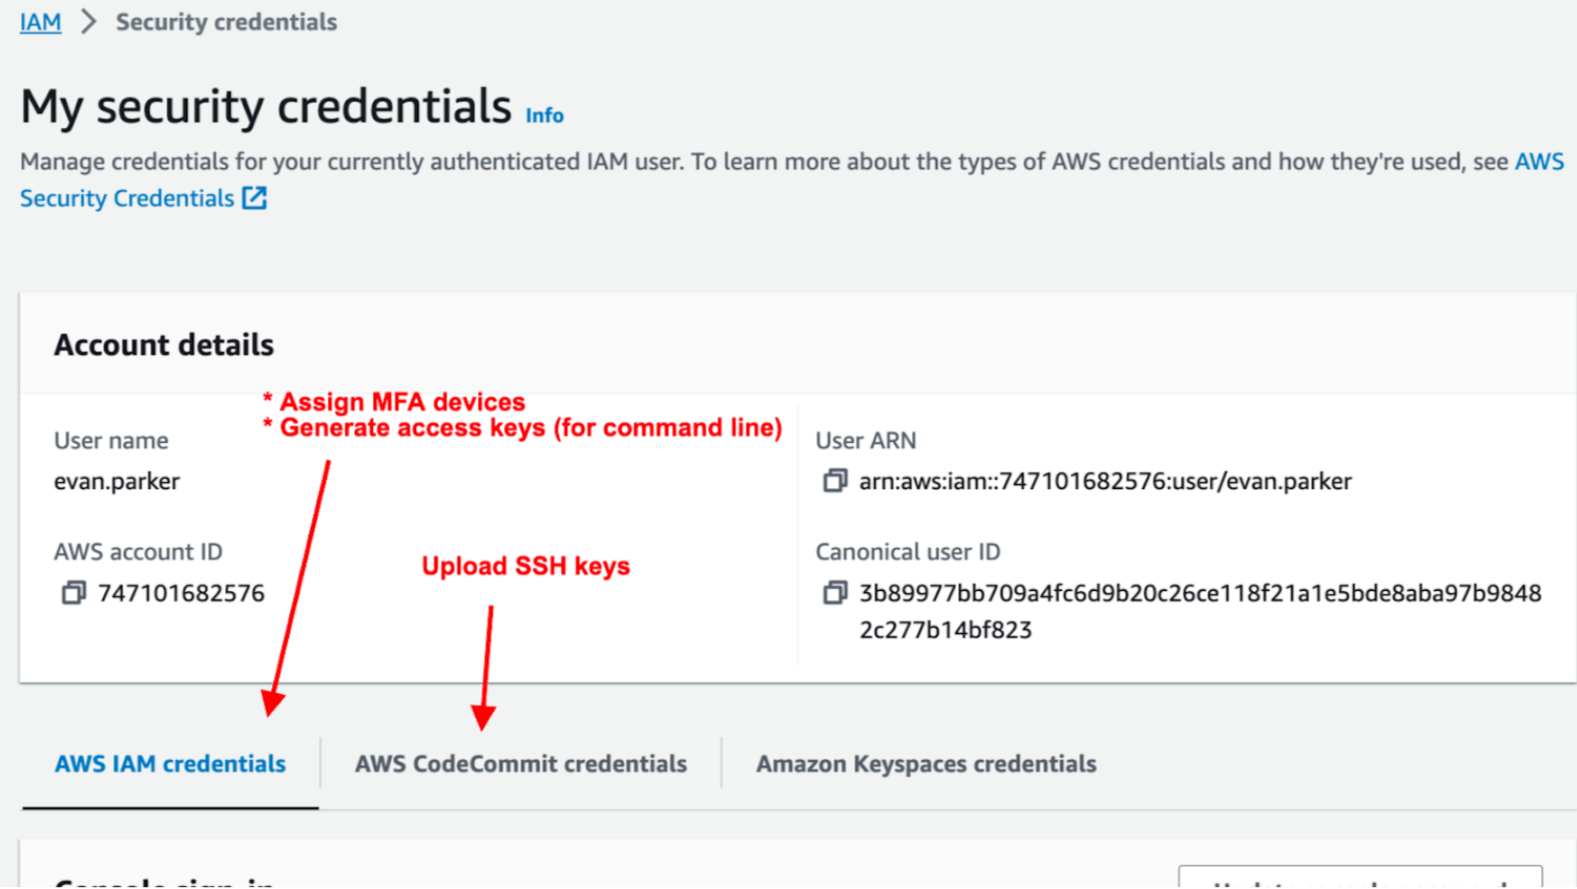
- From the “My security credentials” page, use the “AWS IAM Credentials” tab click “Assign MFA Device” and configure at least one 2-factor authentication method such as Duo on your phone, or a physical security key if you have one.
- From the “My security credentials” page, use the “AWS CodeCommit credentials” tab to upload your Public SSH key.
- If you already have a ssh key you should find the public key at ~/.ssh/id_rsa.pub.
- If you have a ssh private key at ~/.ssh/id_rsa but you don’t have a public key, you can use the keygen program to generate a public key This case can come up when users have already generated a private key from the AWS EC2 key service.
ssh-keygen -f ~/.ssh/id_rsa -y > ~/.ssh/id_rsa.pub - If you do not have a ssh key you can generate one at the shell using the command ssh-keygen. When asked for a password just press enter twice to generate a passwordless key (access to your computer will gate access to your ssh key). When the keygen is complete the program will output your key to the file ~/.ssh/id_rsa.pub.
...
- Install the AWS CLI if necessary (HPC platforms include the CLI in spack-stack).
- Mac: from your shell run
brew install awsclior use one of the other recommended install methods
- Mac: from your shell run
- Go to your “My security credentials” page in the AWS console (see step 4 and 5 in Account setup).
- Click “Create access key” in the Access Keys panel.
- Select the “Command Line Interface (CLI)” use case.
- Check the box to acknowledge and disregard the other recommended options and click “Next”
- Give a short description like “Key for CLI use” and click “Create”
- Save the key ID and the key secret value in a secure location, you will need both in the next step.
- On the command line configure credentials for for your account using one of the commands listed below. The profile name is important since some of our tools (especially skylab) are sensitive to this profile name when authenticating resources. Use your key ID and secret gathered in step two. Configure the region to be the same as used above. Set your output format to “json”.
- To configure jcsda-usaf
aws configure p --rofileprofile=jcsda-usaf-aws-us-east-2- Access Key ID and secret: see step #2 above
- Region:
us-east-2
- To configure jcsda-noaa
aws configure --profile=jcsda-noaa-aws-us-east-1- Access Key ID and secret: see step #2 above
- Region:
us-east-1
- To configure jcsda-usaf
...