CrashPlan is the recommended method for backing up the data on your NCAR/UCAR workstation. CrashPlan Setup
- Launch the CrashPlan application on your system
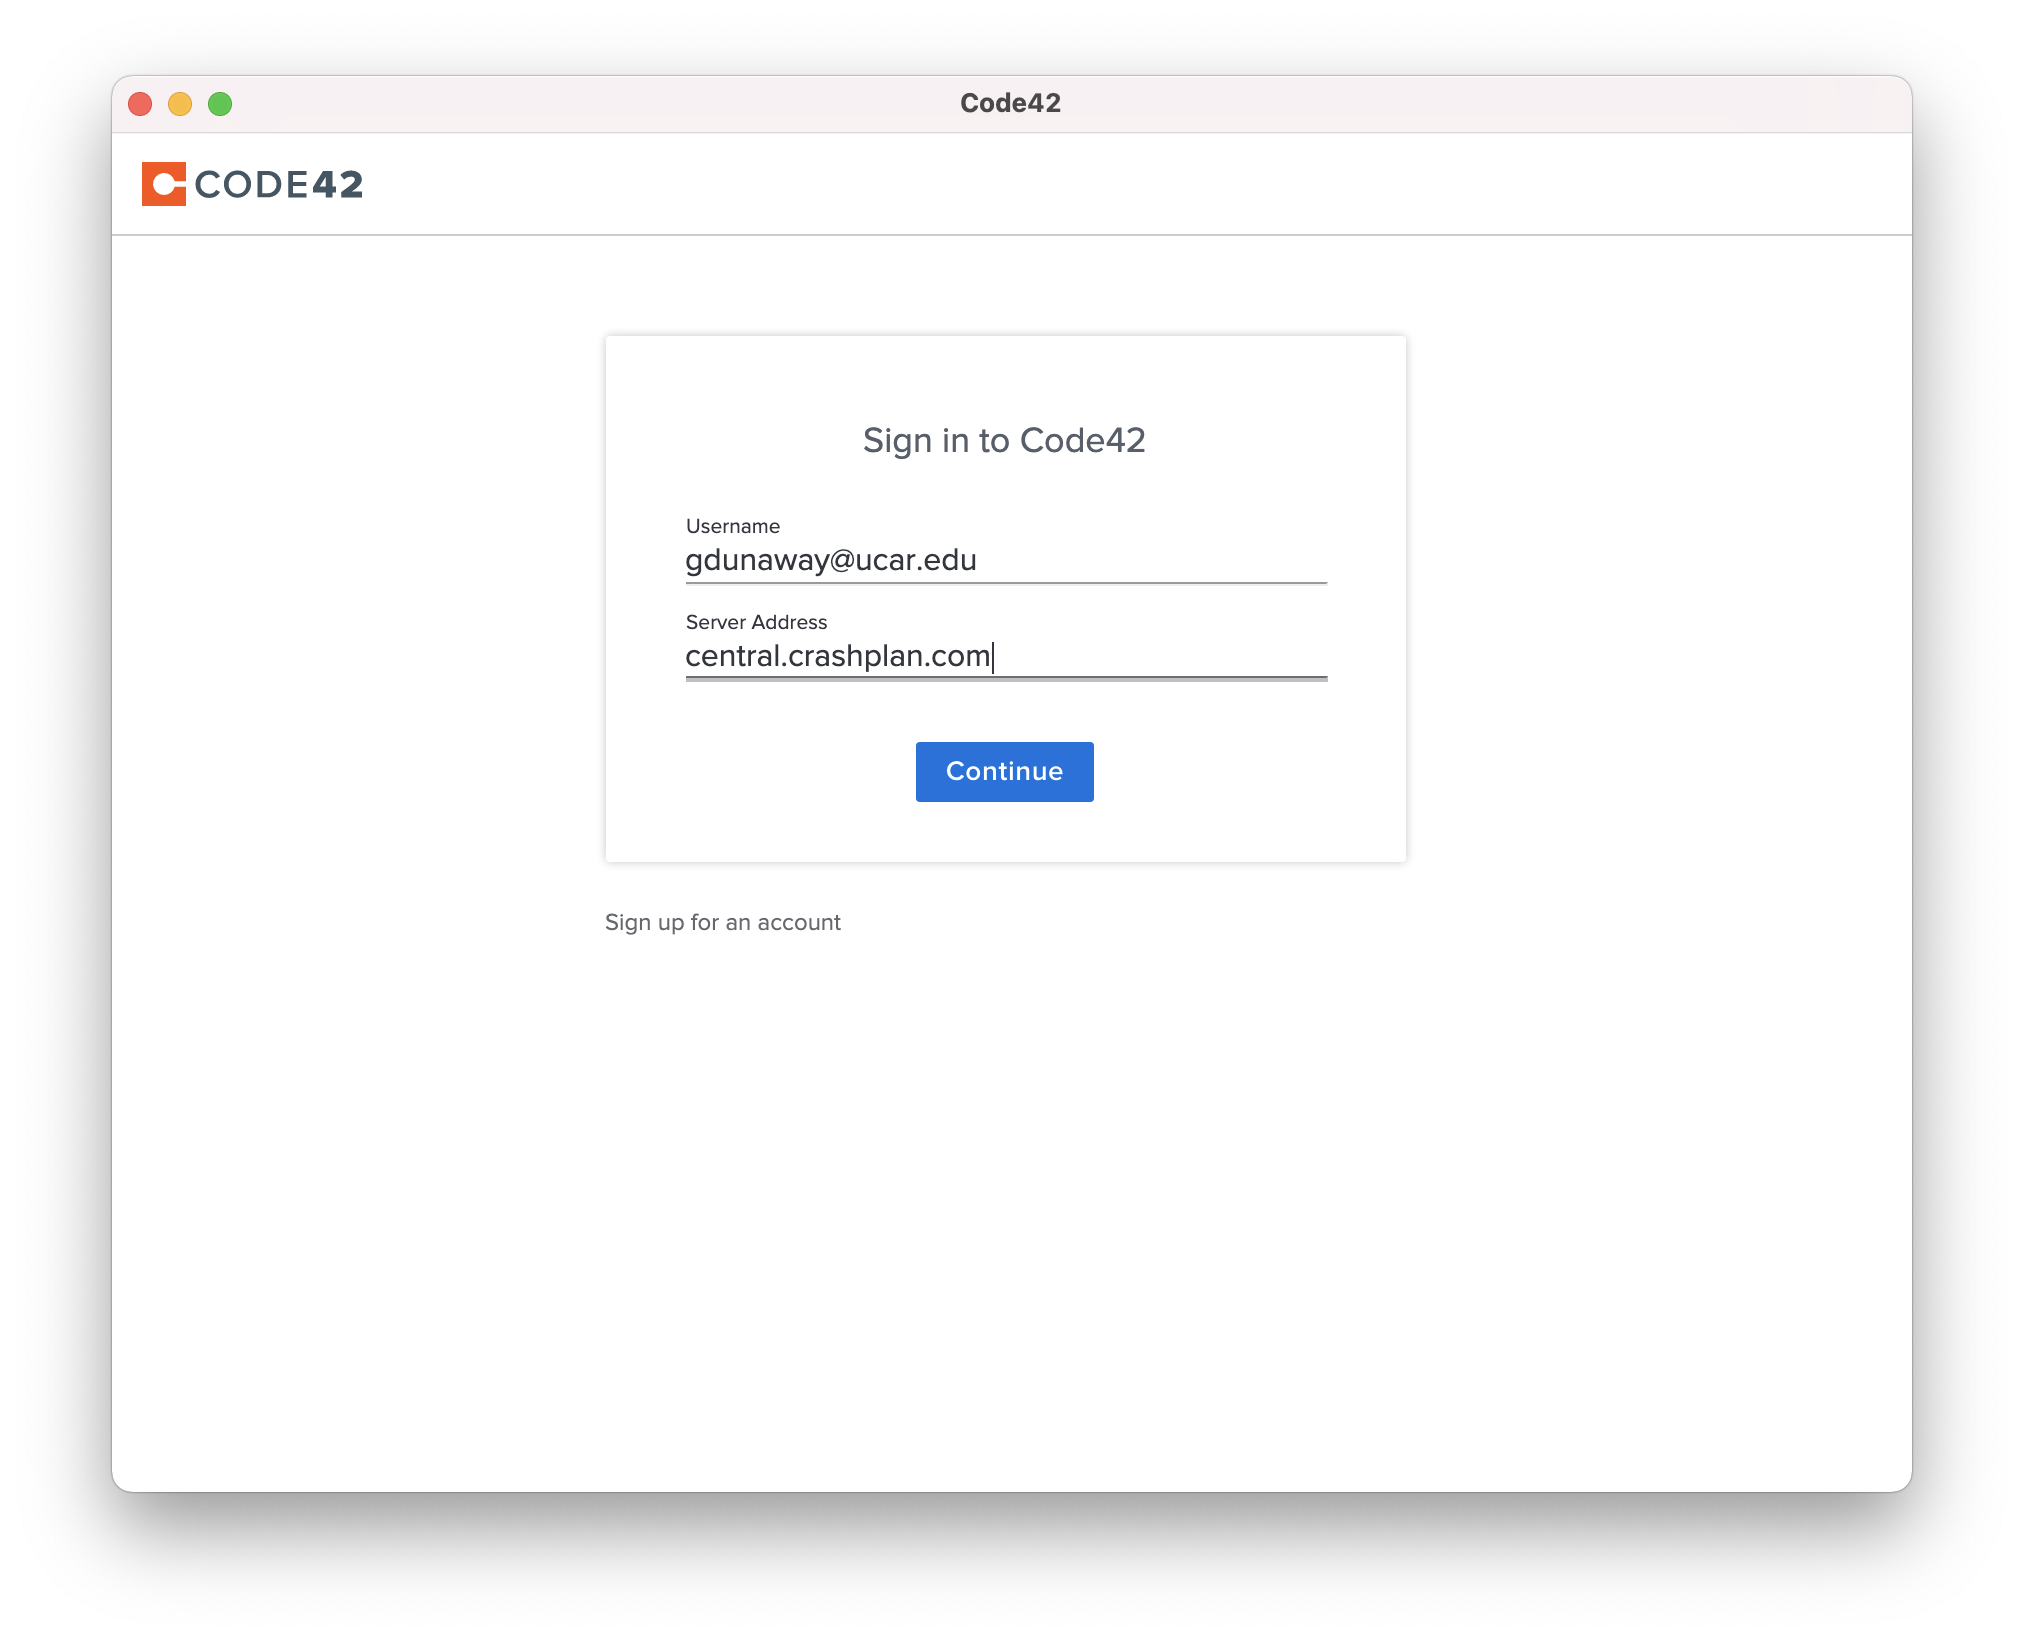
- Sign in using your "@ucar.edu" account and, if prompted, enter central.crashplan.com as the server address
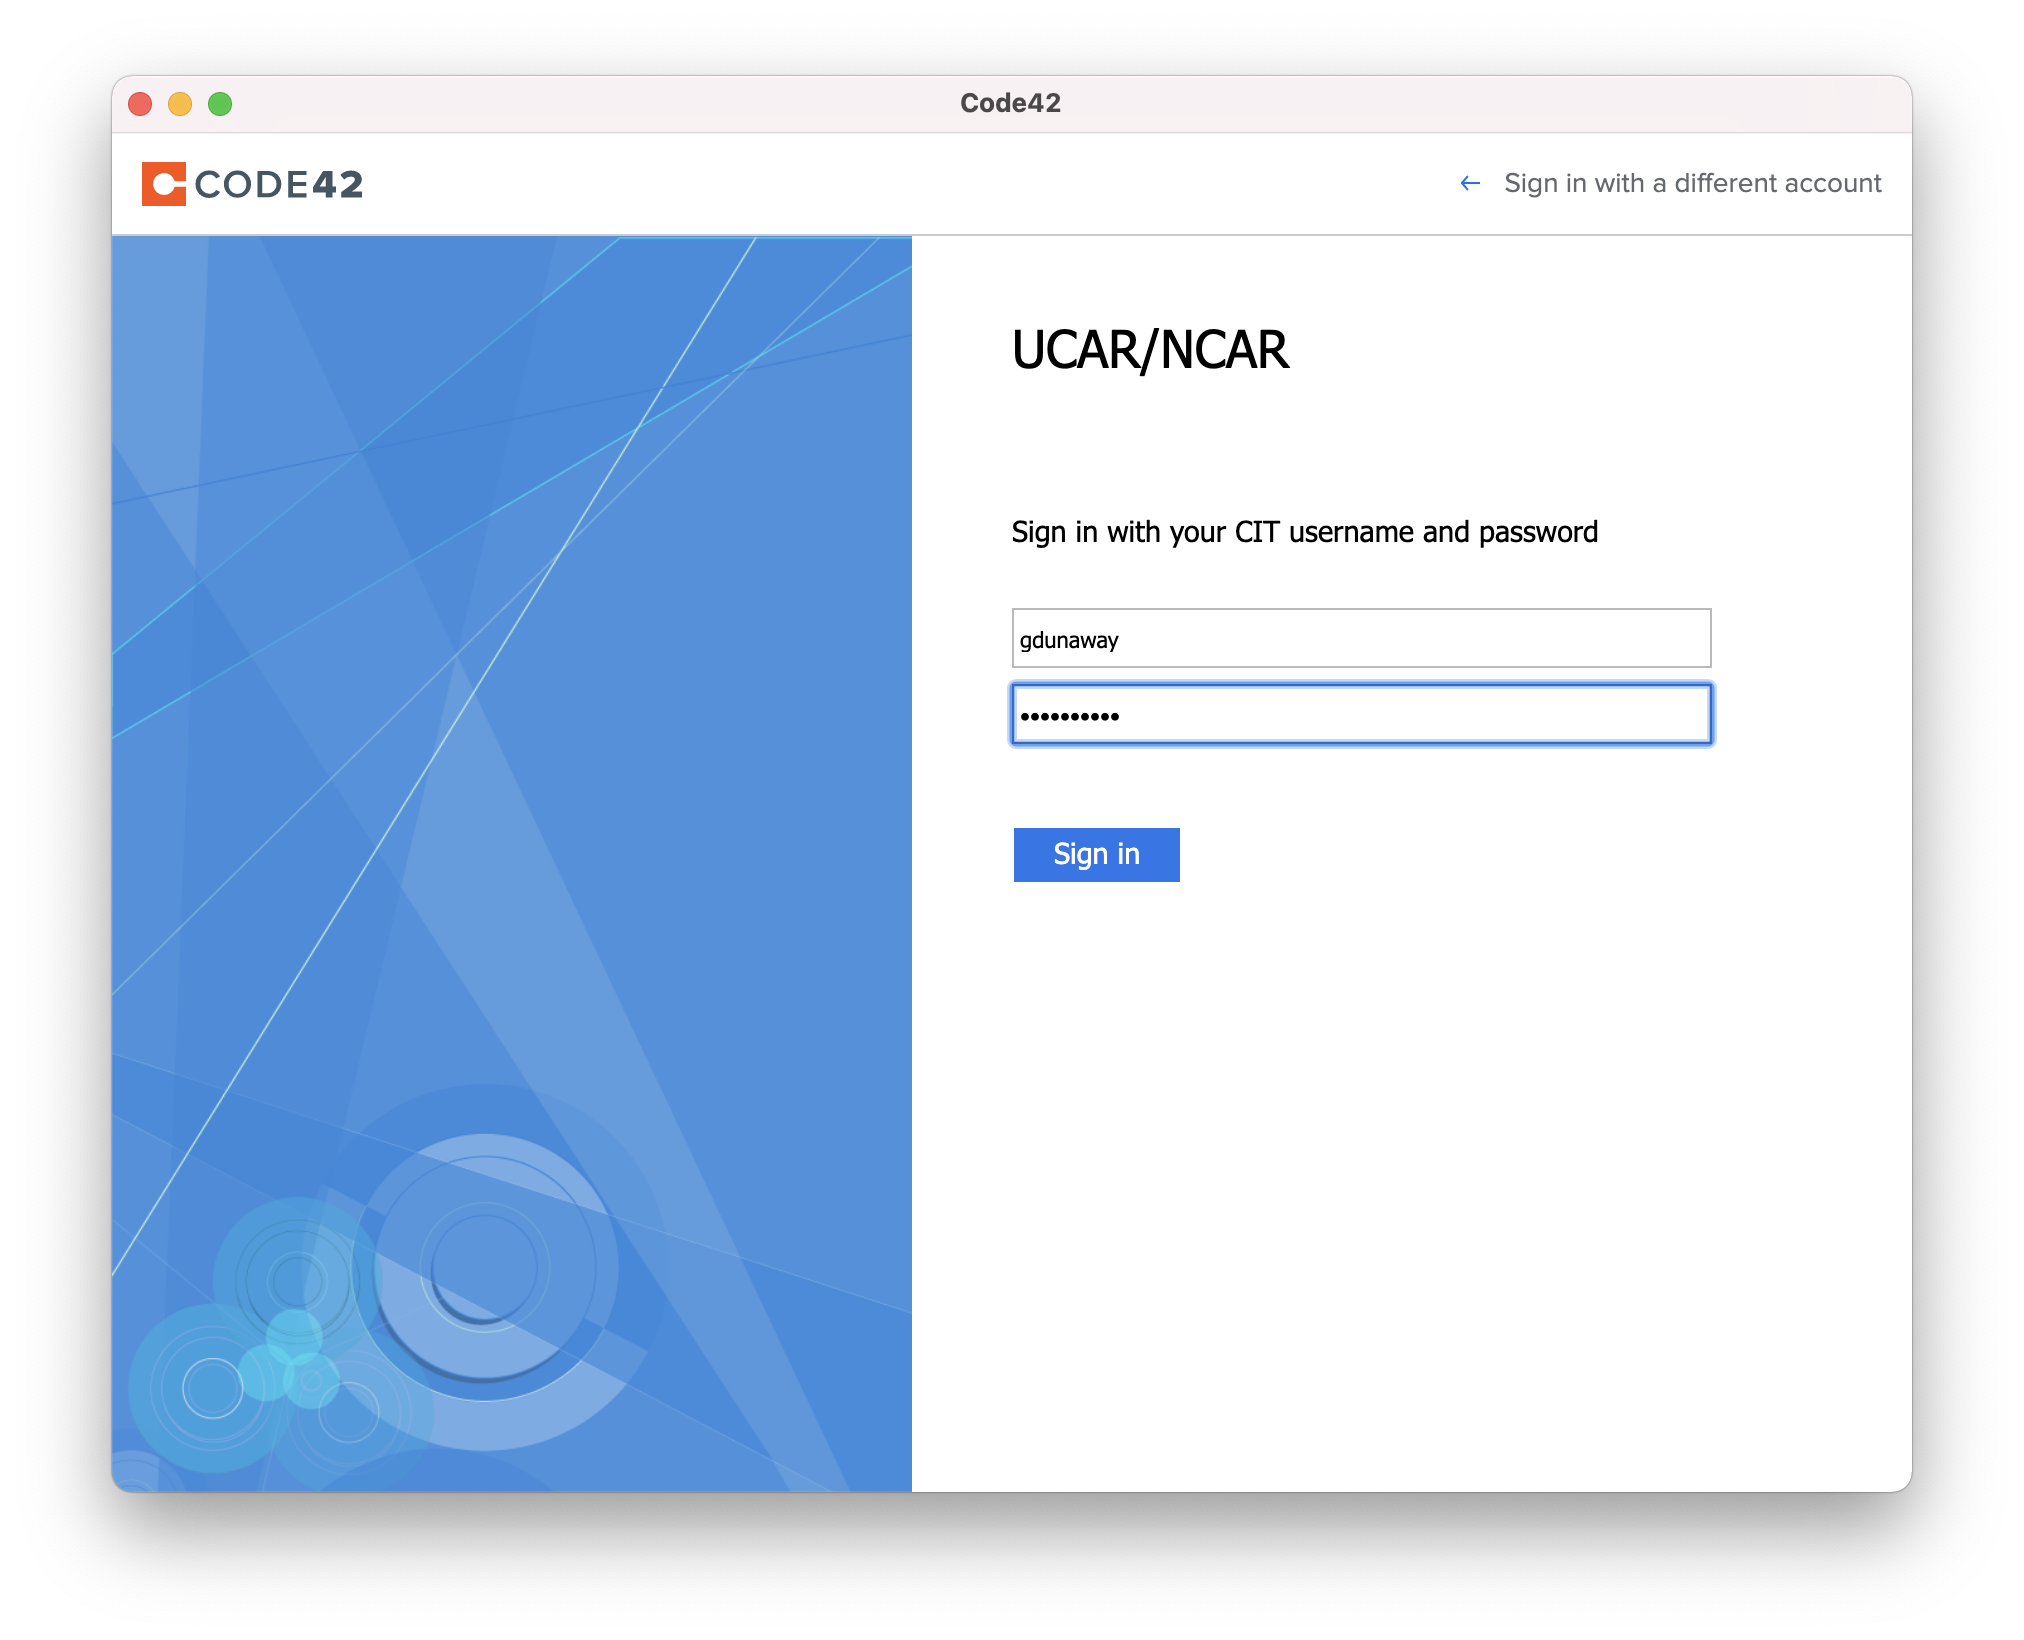
- Use your token authentication (DUO is shown)
- If this device is a permanent replacement for another device, select "Replace Existing" and continue reading the "Replacing a Device" section below. Otherwise, select "Add New Device" and you are done with setup. Read the "Restore Files..." section below if you still need files from another CrashPlan backup.

Replacing a Device in CrashPlan
Replacing devices will keep you from having confusingly redundant or out-of-date backups when you no longer have your previously backed up device. The replaced device would be one you aren't expecting to have in your possession again. If you are unsure of your situation, ask your Systems Administrators for help by submitting a ticket.
- Select the device you are replacing.

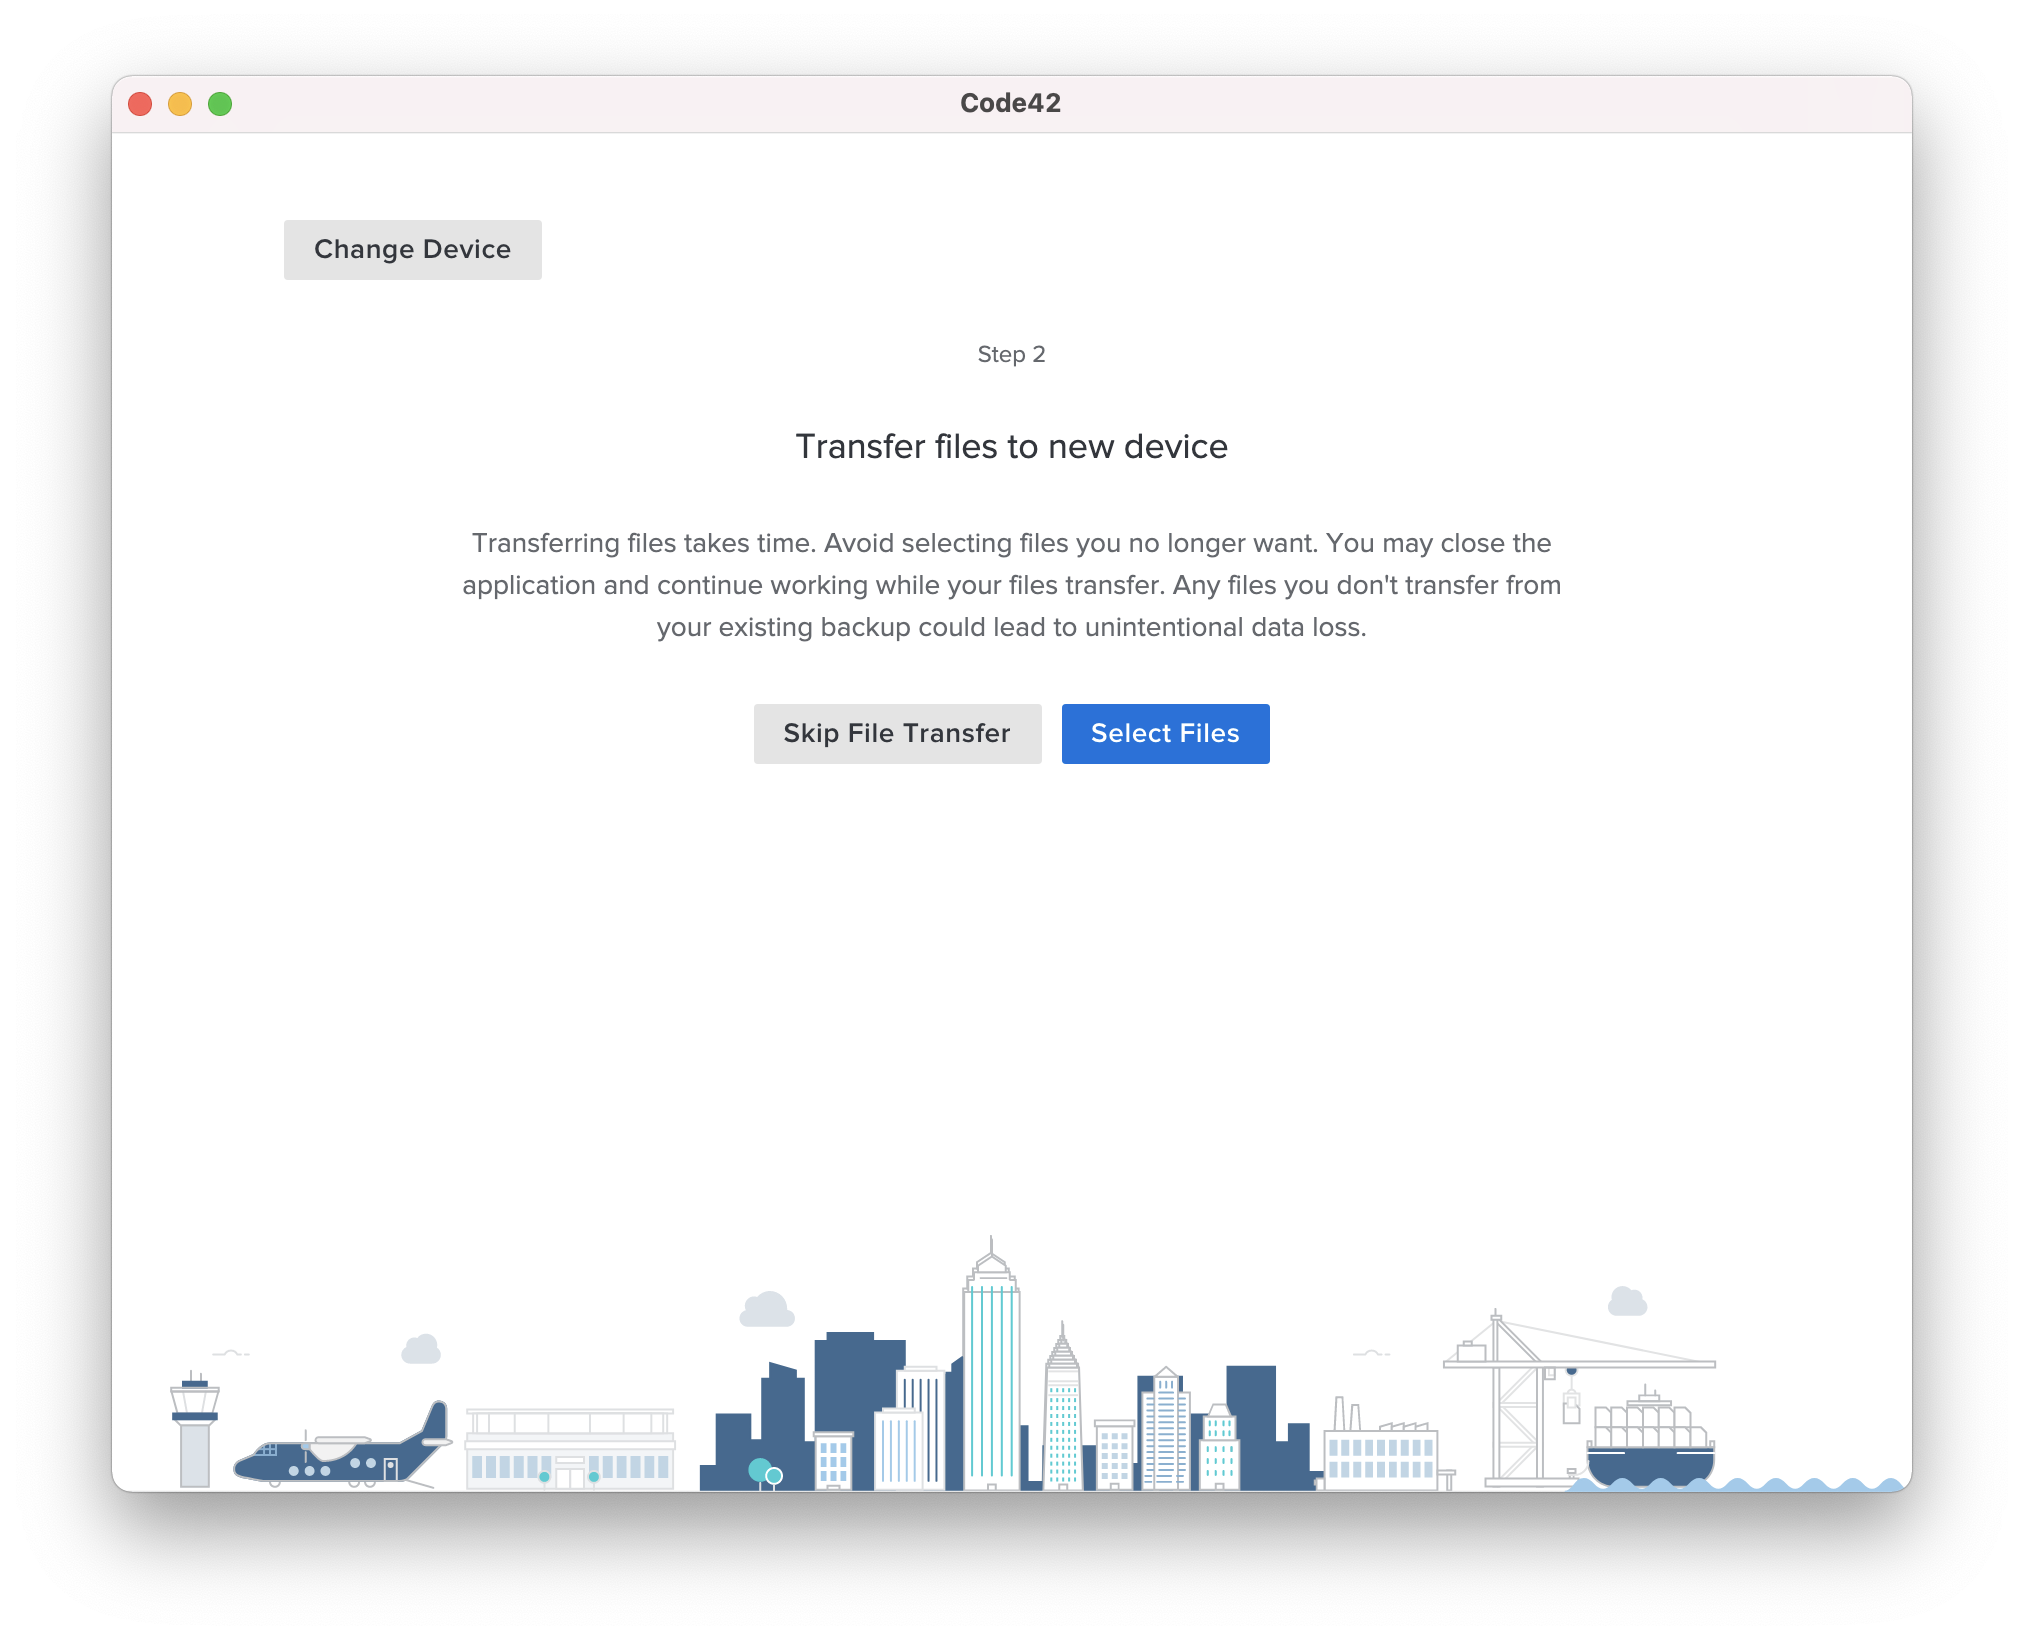
- If you need files from your previous backup, choose "Select Files" and follow directions in the "Restore Files..." section below. If you keep your files elsewhere, like Google Drive, then you can choose "Skip File Transfer".
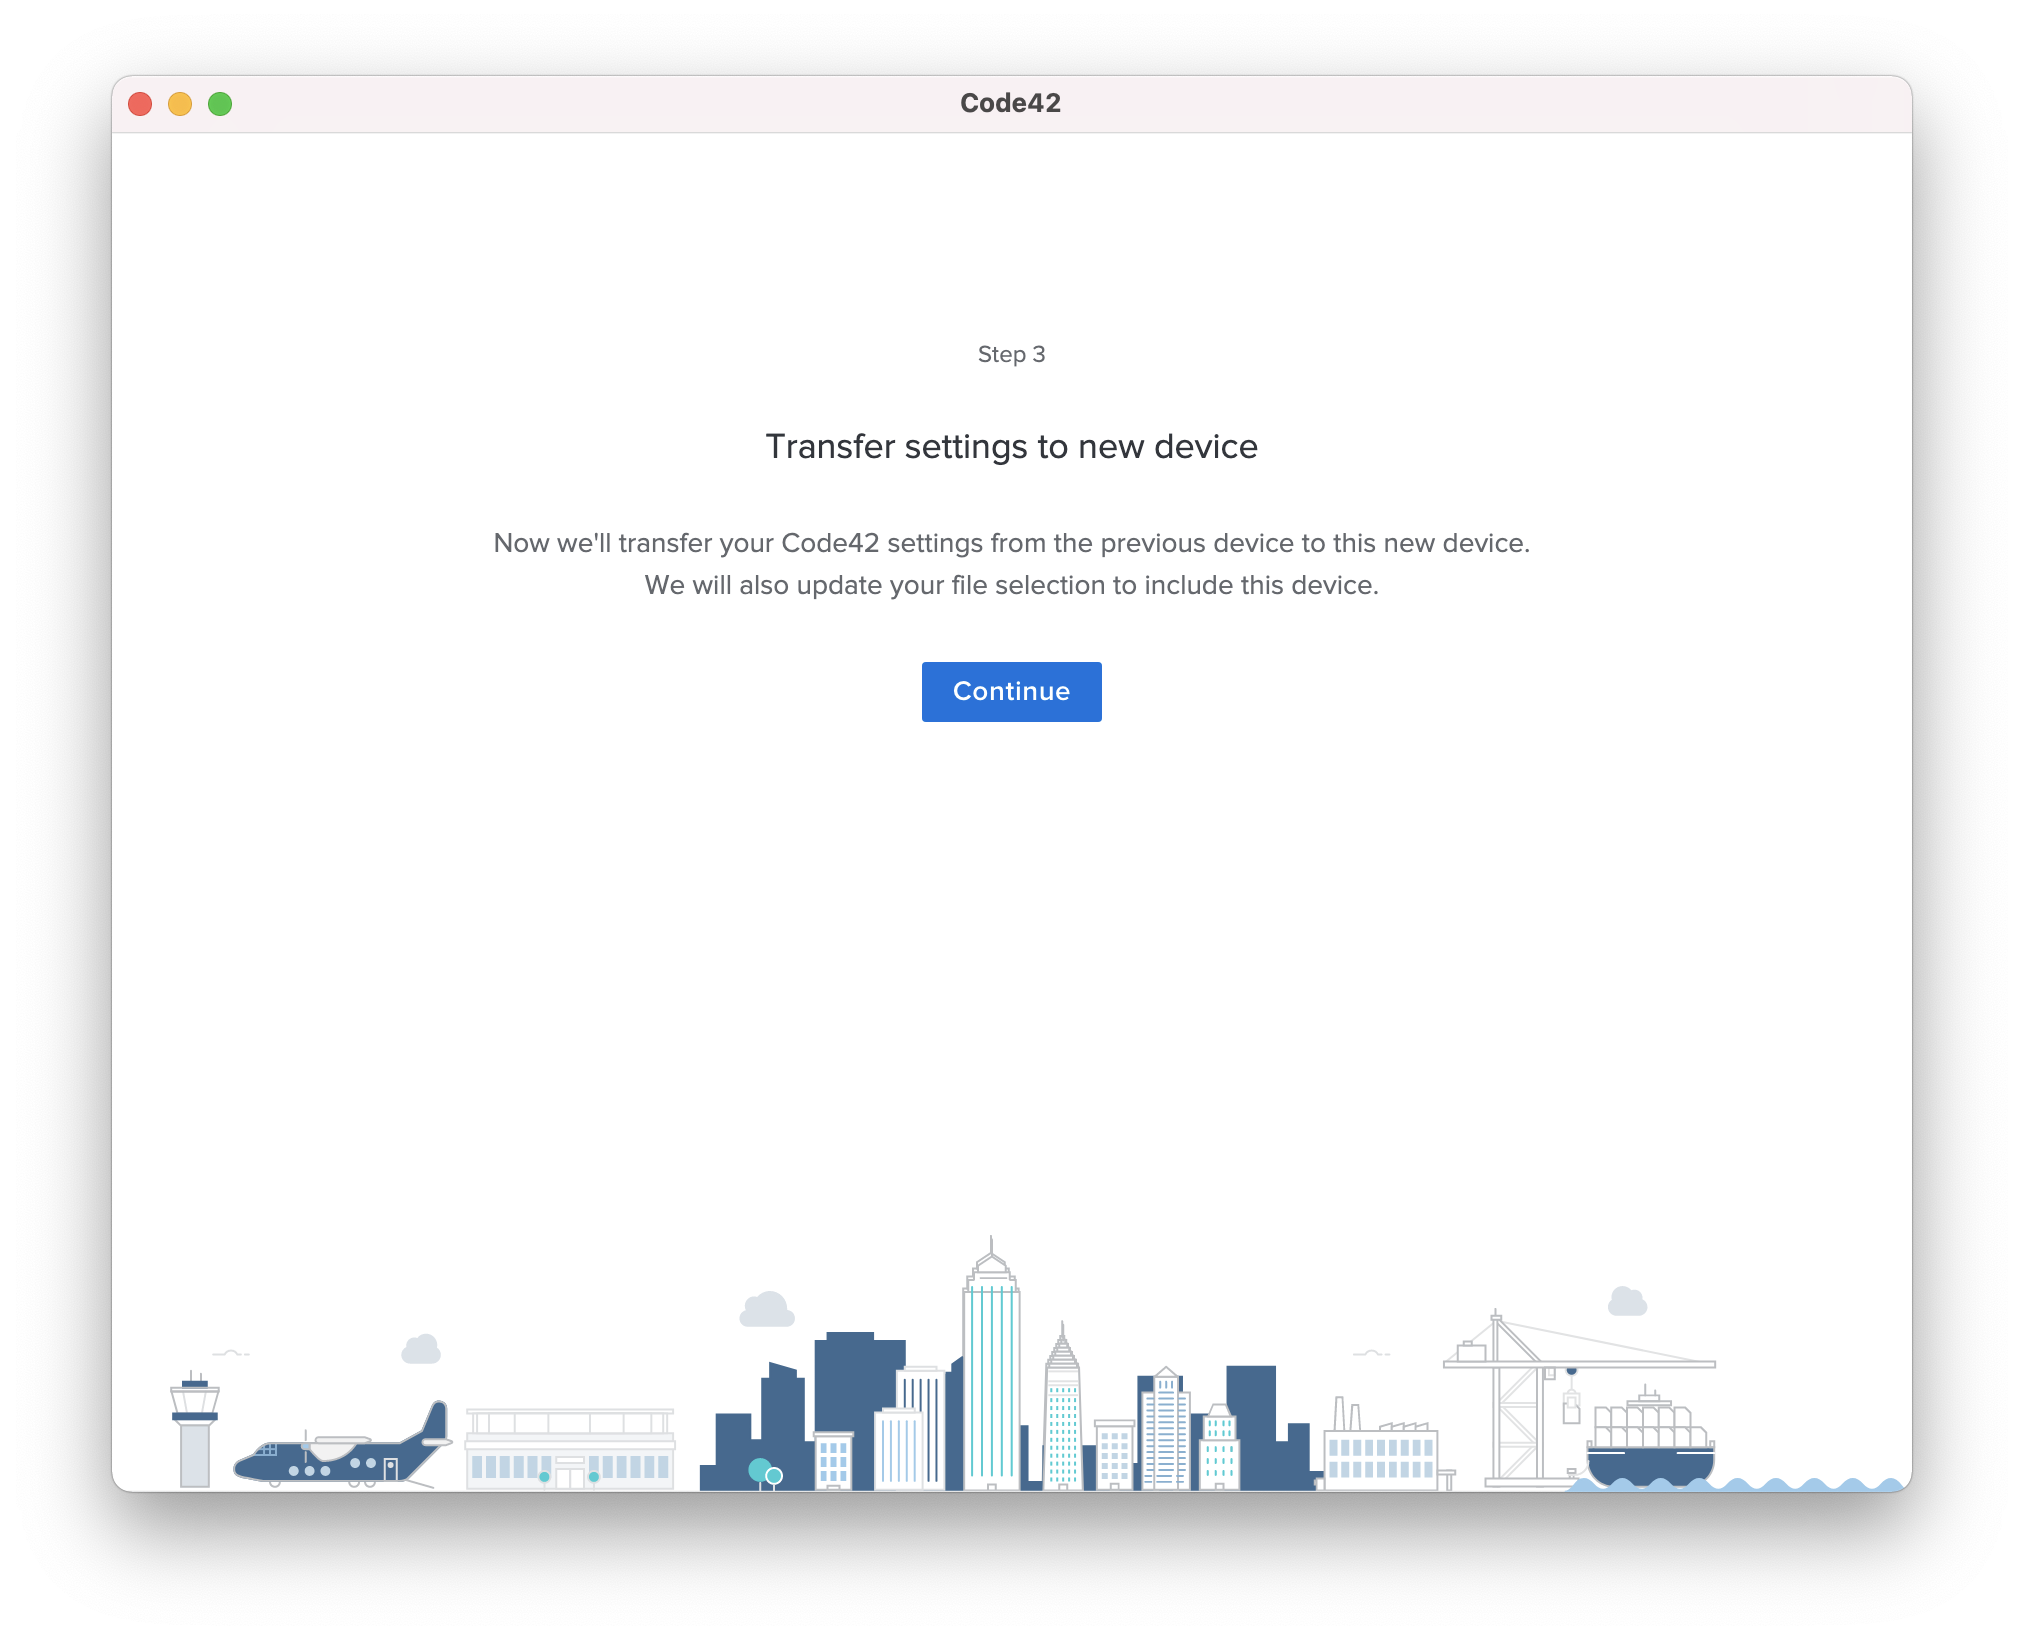
- Continue and wait while CrashPlan renames your previous backup set to match your new system. This will allow you to access your old backup as if it were a backup of your new device and it will prevent unnecessary re-uploading of files from your old backup, if you downloaded them in the last step.
- You may need to sign into CrashPlan one more time after your settings have been transferred.
Restore Files From Your CrashPlan Backup
If you’d like to retrieve files from a backup and put them back in their original directories, follow the steps below.
- Launch CrashPlan > Click the C icon in your menu bar > Open CrashPlan...
- Sign in using your "@ucar.edu" account and token authentication if prompted.
- Click "Restore Files" then select the system you'd like to restore files from
- If you need an older version of a file or a file you deleted, click "As of Today" and select a previous date
- The availability of file versions is dependent on your system completing backups. Read CrashPlan for more info.
Check the files and directories you'd like to restore
- Select "Restore Files" again
- Use the settings: Original Location, Overwrite, and Current
- Click Go.
- You should see the download prepare, then start. It will continue in the background and pause when your computer sleeps. The speed of the download will depend on many factors including size of the data, number of individual files, and network speed.
Reducing the impact of CrashPlan on your network
https://support.crashplan.com/hc/en-us/articles/9018485112589--Use-the-CrashPlan-app-with-limited-bandwidth
Other resources
https://support.crashplan.com/
CrashPlan
CrashPlan Desktop Backup Service